Spider plants are tropicals that make easygoing, adaptable houseplants. Longlived, they perform well with minimal maintenance, becoming mainstays in the collection. Their slender, graceful blades brighten corners and offer textural contrast. They grow beautifully in hanging baskets or pots, happy to spend warm months outdoors or in and overwintering indoors.
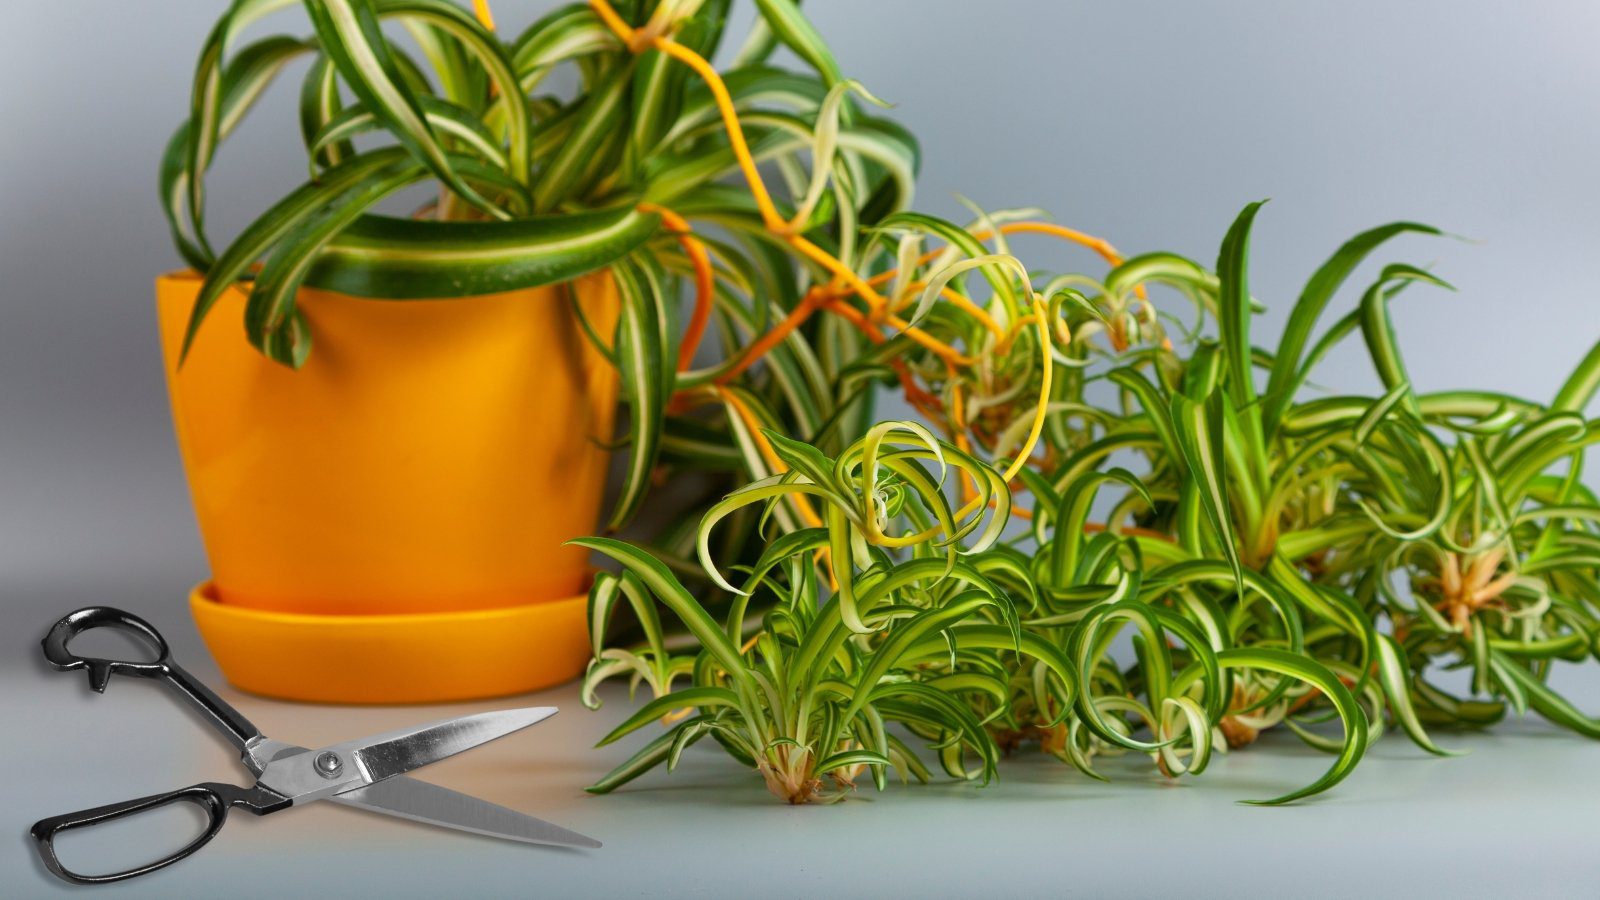
In addition to their grace and easy care, they propagate easily through pretty little plantlets—spiderettes—produced on the ends of long stems. The spiderettes dangle and sparkle to add a little flair and also perpetuate the crop. Removing the spider babies not only creates a new round of spiders, but it also supports the mother plant.
Spider Plant Overview


Spider plants (Chlorophytum comosum) are native to coastal mountain areas of southern Africa and hardy in USDA zones 9-11. They have narrow, green ribbon leaves, often with attractive white or buttery yellow striping.
Spiders prefer bright, indirect light and rebound from a bit of neglect. Their thick roots hold moisture and allow them to weather dry spells (aka underwatering). While they tolerate more shade, they don’t withstand direct sunlight.
Spider plants grow quickly and reliably with good pest and disease resistance. They do best in a pot with slightly crowded roots. The cramped quarters encourage mature plants to produce offshoots.
What are Spiderettes?


Spiderettes (also spider babies, pups, plantlets, and offshoots) are most prolific in the fall and are a means of continuing the population. Healthy, mature specimens in optimal growing conditions produce offshoots. Shorter days and longer nights (increased periods of darkness) initiate flowering, and long, budded stems emerge.
The new leaves begin on the ends of wiry stems and develop more fully as starry white blooms fade. The leafy babies absorb moisture and nutrients from the mother plant to develop.
In nature, they root on the soil surface to continue the colony. One clump at a time, they form a groundcover. At home, we clip them for propagation and to relieve the parent of sharing nutrients.
Why Remove Spider Babies


The spidery pups are pretty as they suspend and add splashy foliar interest. It’s personal preference as to whether to remove them or leave all or some intact. Thinning in phases as they develop is the sweet spot. Take off larger pups as they develop roots, and leave small ones for interest and to develop further. They sure are showy.
The main reason for removing spider babies is to propagate new plants to enjoy or share. Removing the plantlets also reduces the demand for nutrition and moisture from the mother. The primary specimen uses the remaining nutrients to support its regular processes and to continue growing and reproducing.
Without rooting in soil or water, the hanging offshoots won’t develop fully. They’ll continue to rely on nutrient uptake from the mother as they become larger. This reliance depletes energy from the roots and leaves of the primary specimen; if you leave them in place, check irrigation needs and soil dryness more often.
How to Cut Them Off


Cut off spiderettes at any point, any time of year. To propagate them, the strongest will be the larger offshoots with starter roots. Initial roots aren’t necessary for propagation, but they promote faster root development.
Each long, flowering stem holds a few pups. Remove them individually or the entire stem if all are ready. Cut off the stem at its base from the main plant. To remove individual offshoots, clip the stem with sharp pruning shears close to their baby root base.
A best practice is to clean pruners before cutting the stems to sanitize them from bacterial, viral, and fungal pathogens. Use an alcohol wipe across the blades or dip them in 70% isopropyl alcohol to sterilize them.
Propagating Spider Babies


What to do with a bounty of pups? These tropicals do most of the work for us with a ready-made crop. The plantlets root easily in water and soil. Water allows us to see the process over a couple of weeks before planting them, while soil develops strong roots at the start.
If you’ve got the room and resources, it never hurts to have spider plants on hand to share from your own collection.
Root in Water


Rooting in water is a clean way to display new plantlets. Clean a clear jar or small vase in hot, soapy water. Sanitizing it helps reduce any bacteria that could impact the young roots. Fill the jar shallowly with water. The aim is to have only the very base of the offshoot in contact with liquid. Remember, spider plants are sensitive to chlorine and fluoride in tap water. When possible, let it distill before rooting or irrigating.
After clipping the spider baby’s stem near the base, simply situate it in the shallow container. Make sure leaves aren’t submerged, as this can cause rot. Only the rooting area should touch the liquid.
Place the jar in a warm, bright location to foster root development. Change the water if it becomes murky.
Root in Soil


Rooting in soil is very easy as well. Use a small pot and a well-draining houseplant potting mix. Fill the pot and tuck in the pup at its base, keeping the leaves level with the soil surface.
Irrigate thoroughly and move the pot to a well-lit, warm spot out of direct sunlight. Enjoy the new specimen as it grows, checking for moisture needs regularly. Using distilled water, give it a thorough soak when the soil surface is dry. As roots develop, they can dry out slightly between irrigation sessions. Moisten established plants when the surface is dry to the depth of an inch or two.
Another fun soil-potting method is to leave the pup on the stem while it begins to root in a small pot. Place the freshly filled pot below the offshoot and tuck its base into the soil. Pin the stem with a bent paperclip or hairpin and irrigate well. This method mimics the plant’s natural process: it continues to absorb moisture and nutrients from the mother while it roots. After it resists a gentle tug, cut it free from the main grower.
Frequently Asked Questions
A few things contribute to a lack of spider babies. The specimen may be young, still growing foliage and roots before reproducing. If you’ve repotted recently, a roomy container may be the cause. Once roots develop to fill the pot, you’ll likely see more offshoots. Overfertilizing is another cause. Excess nitrogen promotes new growth, but redirects energy from reproducing. Lastly, monitor light exposure. Too much sun inhibits plantlet production.
Spider plants are not toxic to people or pets. They’re safe for kids and a great beginner houseplant, durable and forgiving.
Indoors, the offshoots can emerge any time of year. Being snug in their pots helps production. Fall is the primary time as day length shortens and dark hours increase. A few weeks with shorter days and longer nights triggers the growth.


